You’re managing a new insert, box, or promo kit — and suddenly you’re hearing about dielines, cutting dies, tooling costs, and “production-ready files.” It’s not clear what’s actually needed, but you know this: if something’s wrong, it’s going to be expensive.
Why Dielines Matter in Print and Packaging
A dieline is more than just a template—it’s the foundation of a successful print project. It ensures your design translates cleanly from screen to shelf (or doorstep). Done right it keeps everything in place — visually and structurally.
Here’s why it matters:
- Precision fit: Guarantees your packaging is the right shape and size, so nothing arrives warped, crushed, or off-center
- Structural integrity: Ensures folds, cuts, and glue points work together to hold everything in place
- Design alignment: Makes sure logos, text, and artwork land exactly where they should—no awkward cropping or misalignment
- Production-proof: Helps avoid surprises at the press with clear guidance on bleeds, trim, and safe zones
3 Things to Know Before Your Dieline Gets Created
Creating a dieline isn’t just about shape—it’s about strategy. Before you start, consider these critical factors:
- Product Size & Fit: Your dieline should match the exact measurements of the product to ensure a snug, secure fit. A well-sized package protects the item inside and minimizes waste.
- Product Weight: Heavier products may require sturdier materials or reinforced structures. The dieline should account for these needs, particularly around stress points like folds and glue areas.
- Packaging Use Case: Is the packaging meant for shipping, retail display, or unboxing experiences? The end use will shape your dieline design—literally. Retail packaging might need windows or hang tabs, while shipping boxes may need extra padding or closures.
What Tools Are Used to Create Dielines
Creating accurate dielines requires the right tools. These programs help designers and production teams map out precise cuts, folds, and artwork placement:
- Adobe Illustrator: the industry standard for vector-based dielines. Offers precise control over lines, layers, and alignment.
- CorelDRAW: the popular alternative with strong layout tools and user-friendly interface
- ArtiosCAD – Built specifically for structural packaging. Best for creating complex dielines, 3d mockups, and engineering-grade designs.
These tools allow for detailed control over cut lines, folds, and artwork alignment, helping ensure production accuracy.
Can You Use Canva to Make a Die Cut?
Canva is a popular graphic design tool, and many early-stage brands experiment with it for packaging because it’s fast and easy. While it’s great for quick mockups or presentations, Canva isn’t designed for professional print production. It’s missing critical features like proper bleed setup, dieline layers, and CMYK color control—all essential when your design heads to press. Whether you’re building your dieline in Illustrator or getting a rough mockup from Canva, the goal is the same: a file that reflects real-world use, not just a design comp.That’s where production experience makes all the difference.
Our Role in Dieline Creation
For many emerging brands, packaging starts with good intentions — standard sizes, generous padding, and a hope that everything arrives looking decent. But as brands grow, so do the stakes. Products don’t quite fit. Boxes bulge or crush. The unboxing feels off. What once felt like a cost-saving decision starts costing more — in damage, in inefficiency, and in brand experience.
Flyleaf helps brands move from “good enough” to packaging that fits — functionally, structurally, and visually. One example: Great Jones. They wanted packaging that reflected their bold, playful cookware — and actually protected it in transit. We developed structural dielines from physical product samples, dialing in the fit, board strength, and construction details to ensure durability and a better fulfillment experience.
Those dielines were then handed off to Pentagram, who led the creative direction — from jewel-toned color palettes and lush illustrations to witty messaging and unboxing details. Once their artwork was complete, Great Jones returned the files to us for production. The result was packaging that looked like Pentagram, shipped like Flyleaf, and felt fully on-brand from the first click to the final delivery.
Today, we help brands at all stages create dielines that are not just technically sound, but production-ready. That means accounting for tolerances, board behavior, fold and glue placement, bleed areas, and real-world use — not just flat file perfection. Whether you’re handing artwork to a creative partner or going straight to press, we make sure your dieline is ready for whatever comes next.
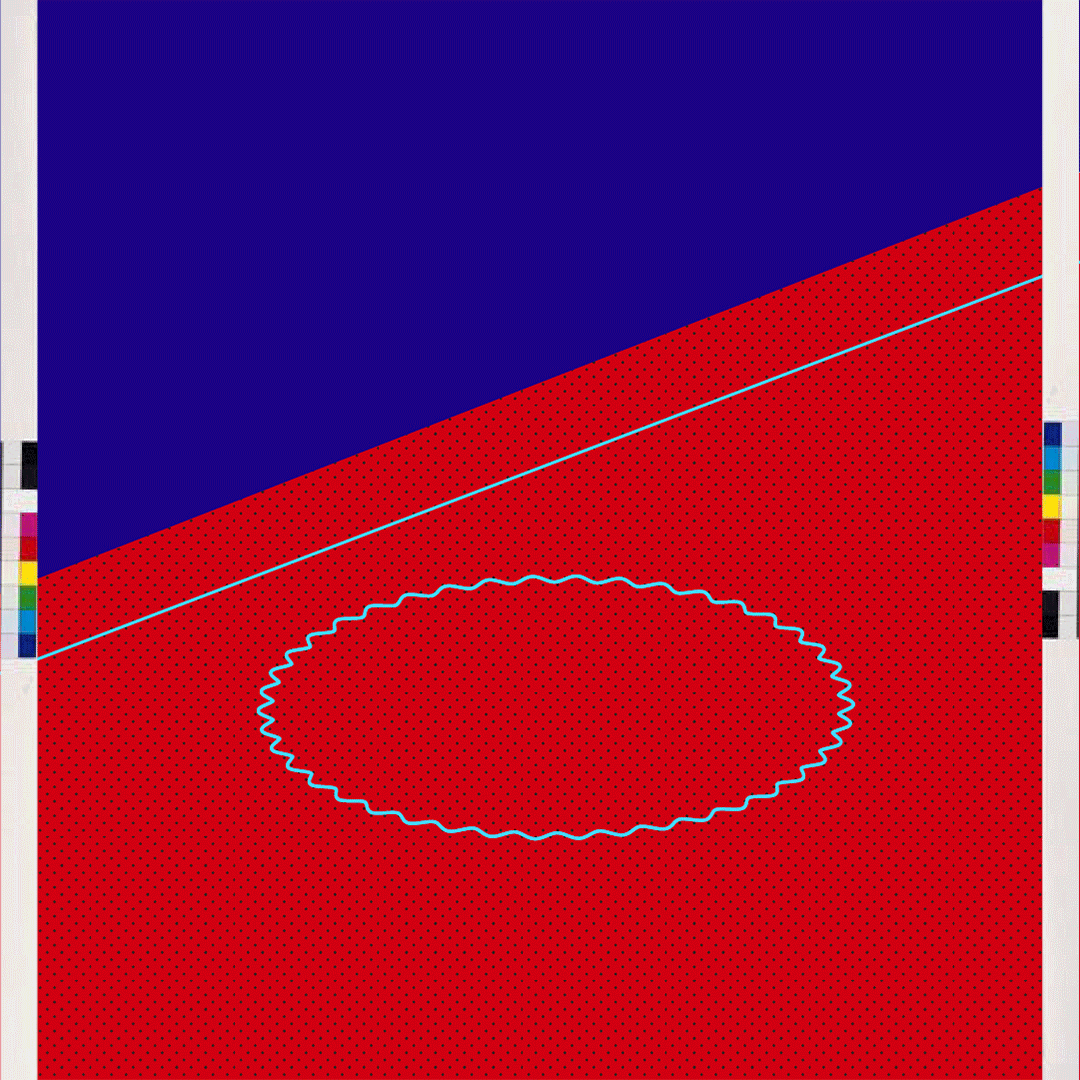
What Are the Most Common Dieline Mistakes?
Even small oversights in dieline setup can cause big headaches later — from print delays to packaging that doesn’t work as intended. Here are a few issues we help clients catch before things go to press:
- Incorrect dimensions or scale mismatches
- Missing or inaccurate bleed and safety zones
- Omitting creases, tabs, or fold lines
- Text or artwork placed too close to the edge
We always recommend reviewing dielines carefully before approval — and when possible, creating a physical prototype. It’s one of the easiest ways to spot problems before they become expensive.
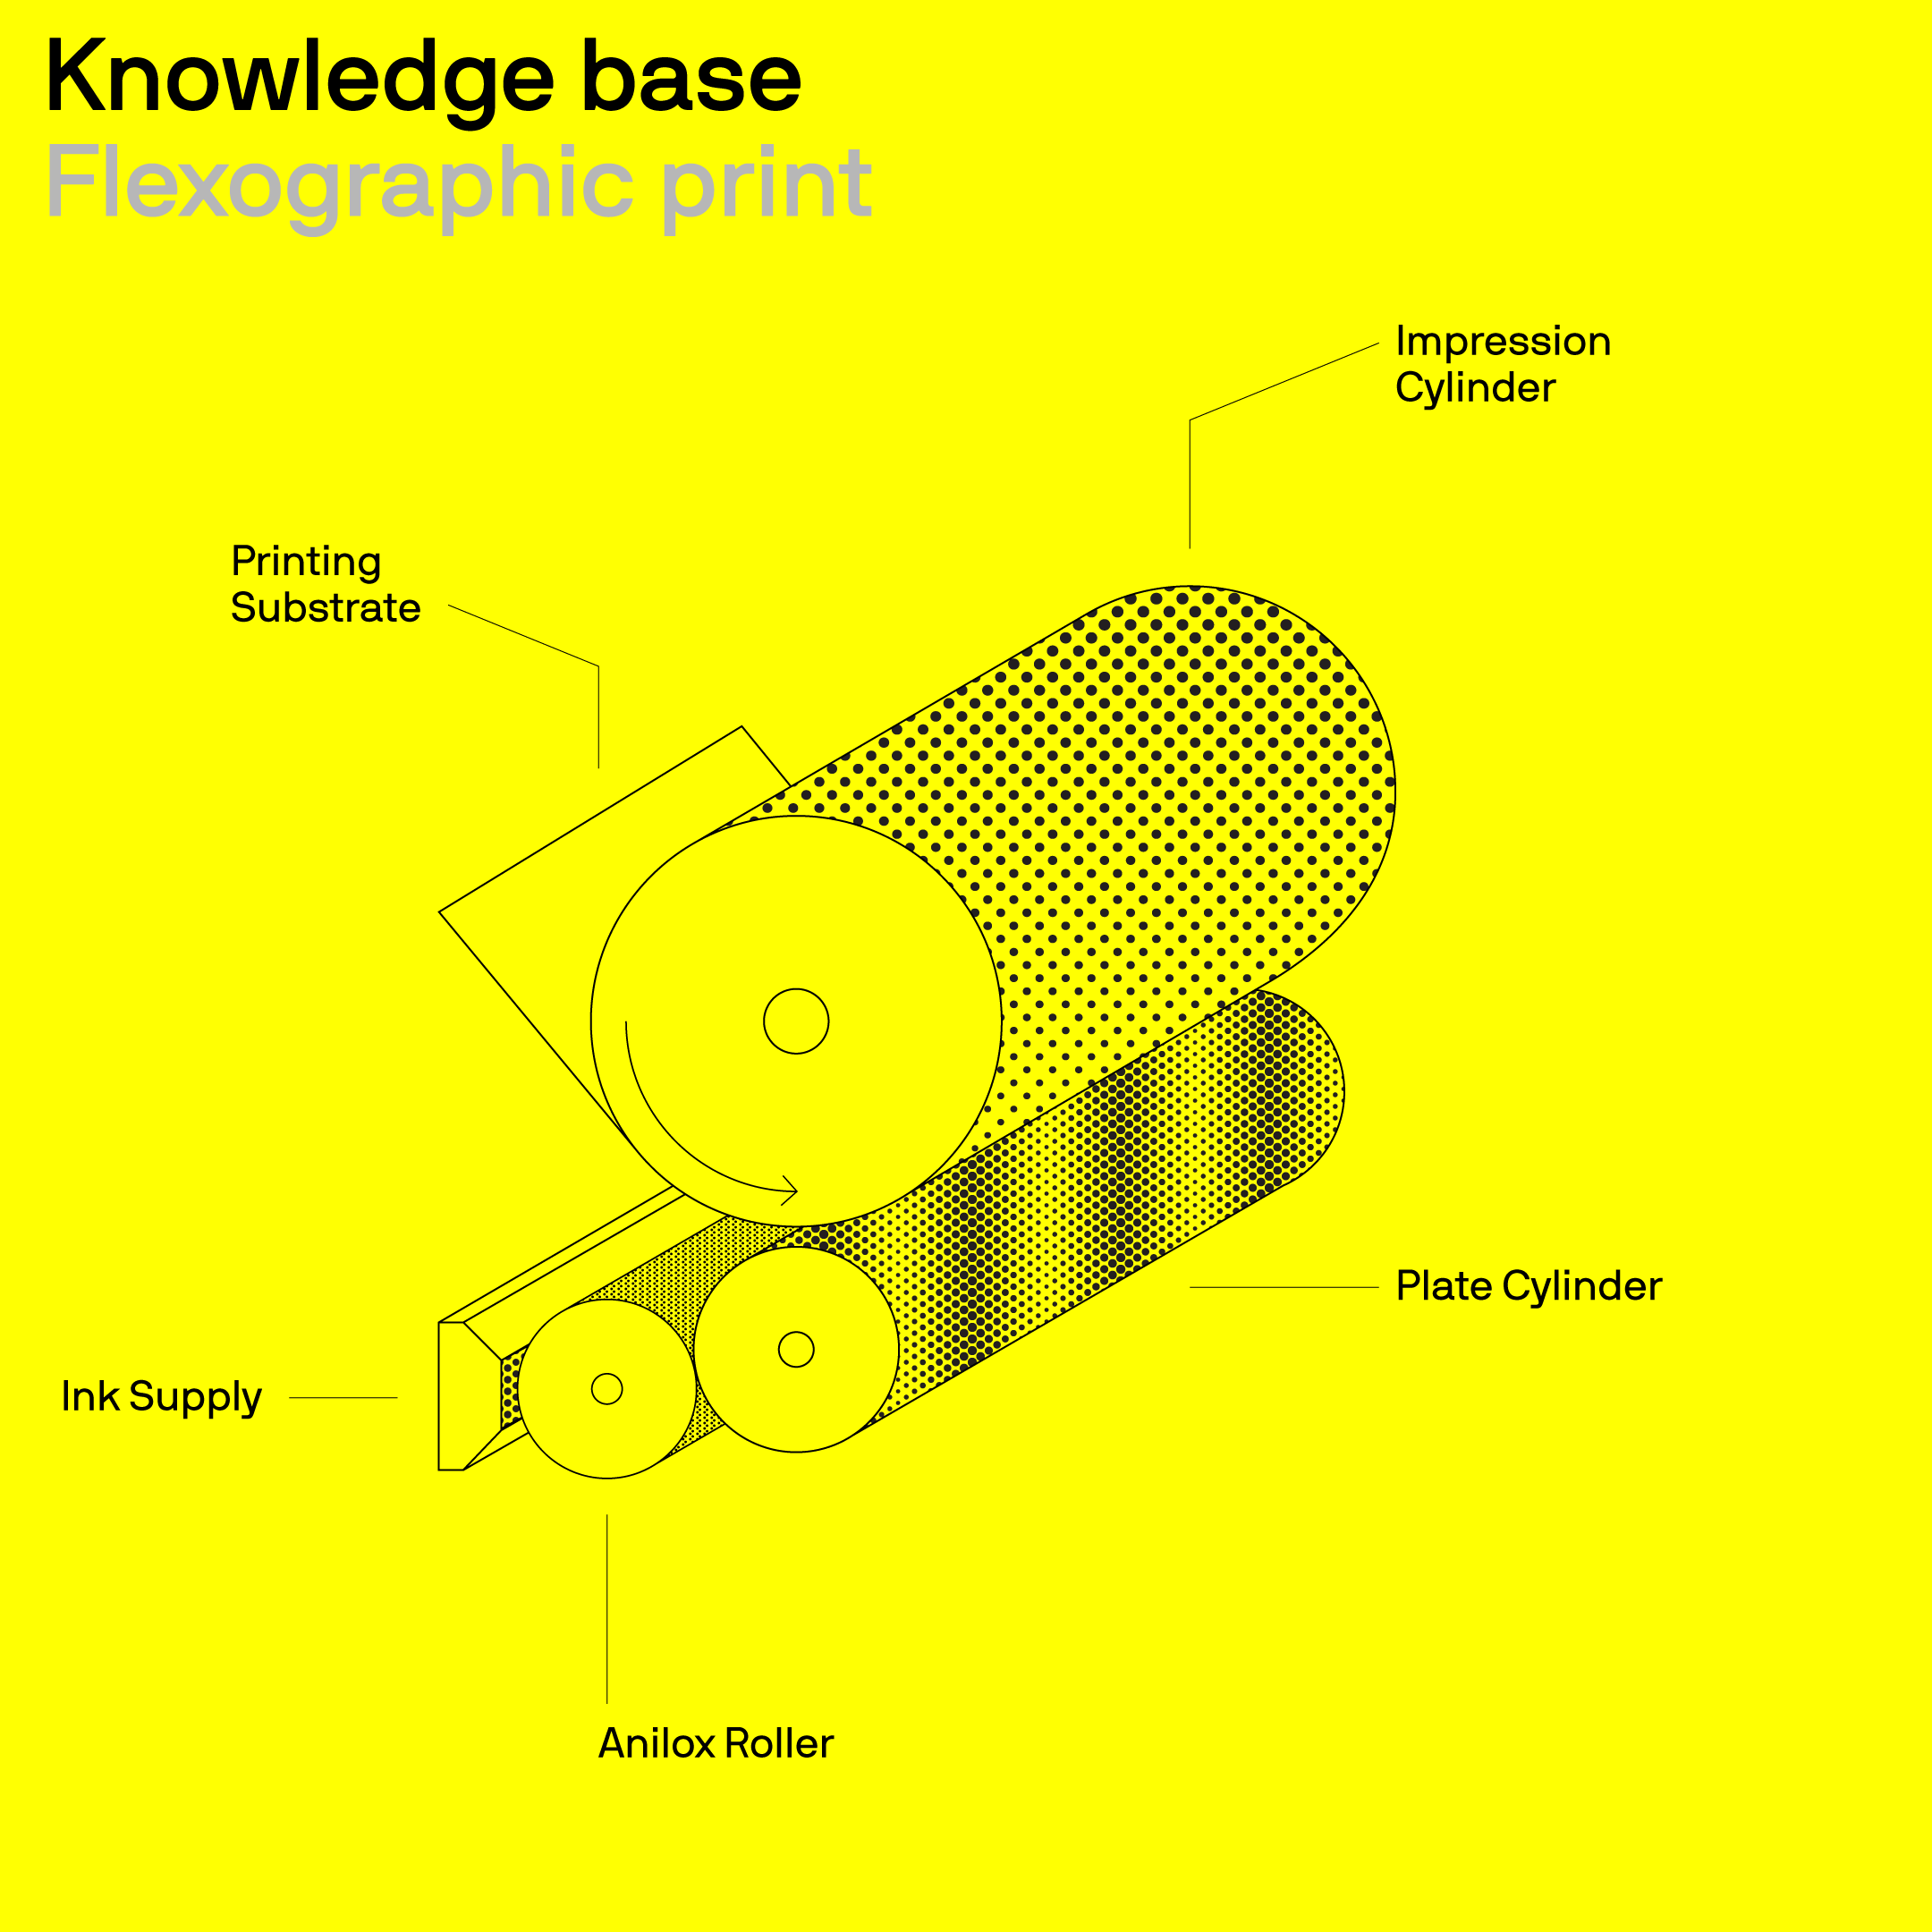
What is Die Cutting and How Does It Work?
Once your dieline and artwork are approved, the next step is die cutting — the process that gives your packaging its final shape. Die cutting uses custom-built steel blades (called “dies”) mounted on a press to cut, score, and crease printed materials like corrugate, chipboard, or paperboard. It’s essentially industrial cookie-cutting — but engineered for speed, precision, and repeatability.
What Are the Different Types of Die Cutting?
Different production methods are used depending on your quantity, budget, and lead time:
- Flatbed Die Cutting: Most common for folding cartons and rigid packaging. Uses steel rule dies and offers high precision. Good for medium to large runs.
- Rotary Die Cutting: Ideal for high-speed, high-volume jobs (like labels). Dies are mounted on cylinders for continuous cutting.
- Laser Cutting: Tool-less, digital process used for prototypes or short runs. No metal die is needed, which saves time and setup costs — but digital production per-unit costs are higher.
At Flyleaf, we often use laser cutting for low MOQs to help clients avoid tooling costs during early-stage production.
When Does Packaging Require Tooling — and What Does It Cost?
Not every packaging run requires custom tooling — but when it does, here’s what to expect:
- Offset or flexo-printed folding cartons or corrugated boxes
- High-volume runs where repeatability matters
- Special finishes like windows, cutouts, or complex shapes
When Tooling Is Not Required:
- Short runs using digital printing + laser cutting
- Standard sizes with pre-existing dies (if customization isn’t needed)
- Flexible materials like labels or pouches, which may use rotary blades or slitting
Lead Time Warning
Custom die creation typically takes 3–7 business days, sometimes longer during peak seasons or if iterations are needed. For emerging brands working on tight product launch schedules, this step often gets overlooked. Die creation and approval can easily add 1–2 weeks to your timeline — so plan accordingly.
Bottom Line
Dielines and die cutting are two sides of the same process — one plans, the other produces. When built right, they make sure your packaging fits, functions, and looks the way you intended. You don’t need to be a print expert to get it right — but getting the dieline right is where everything starts.
Before you go, check how Flyleaf supported Great Jones and explore Pentagram’s creative case study.